Are you tired of manually changing each elements name, specially when you have many of those? Then you're in the right place!
Introduction
RatedPower besides allowing the users to create from scratch new sites on the platform using the feature Interactive Site Creation (ISC), the users also have the possibility to upload any existing site in either KML or KMZ format. In some instances, it is possible that you have many parcels or elements on your site, and because RatedPower has a specific naming convention in order to read and identify each element (e.g available areas, points, restricted areas, etc.), you can find time consuming to manually have to change all of those. But don't worry, because in this article we'll guide you step-by-step on how you can quickly solve this.
Different ways to rename all elements
There's two ways that you can change the elements naming all at once.
- Using RatedPower Interactive Site Creation Tool (ISC);
- Using QGIS;
Using RatedPower ISC
In which instances would you use each? Well, using the ISC is probably one of the easiest and quickest ways. In order to easily do that, you would need to re-organize the site folder inside Google Earth, and work on each one individually.
Most likely you would have a file with the following structure:
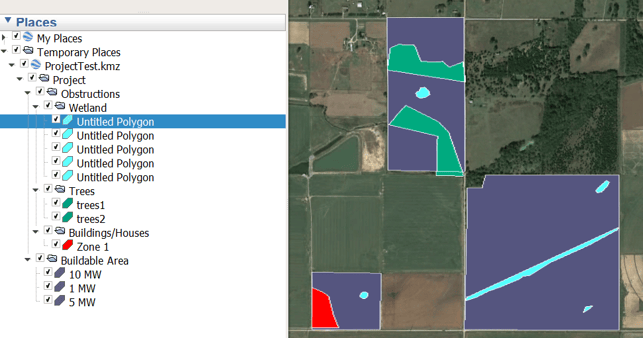
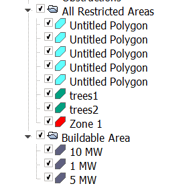
From here we would create new folders and sort them by the elements RatedPower uses.
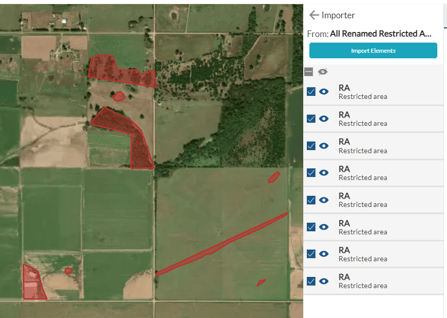
After sorting the elements by the appropriate folders and save them, you would upload each KML in the ISC. Once you upload them and select one element or more, a dropdown button will reveal and you will be able to select the type of polygon they should be assigned.
If you have both many AA's and RA's, the recommendation is to upload one folder at a time, assign all elements to their specific type and download that KML. Delete all elements, do the same procedure for the other type, and after that upload the previous KML with the elements already named.
If for some reason when uploading it fails, then probably one or more elements are corrupted and need to be fixed. In order to do that we'll need QGIS, which is a software that you can download for free. But before heading there, we'll need to make some changes on the site using Google Earth, so that we can both fix the file and rename all elements at once.
Using QGIS
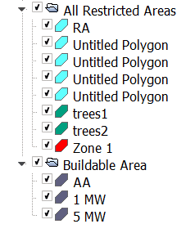
On the folders created, you'll need to rename the first element as the name you want to apply to all the elements in that folder.
After that, we save the folders and work individually on them using QGIS. If you're new to this software and need some guidance, you can access the following article How to modify a site in QGIS (I): Unify areas, where we provide some step-by-step procedures. After that we'll need to:
- Load KML on QGIS
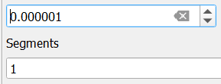
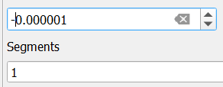
- Apply two buffers, one to increase and the other to decrease back to original size. Suggested numbers
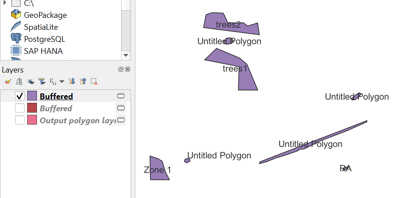
- Use the dissolve feature. We can see that right after that, there's only one name that will be shown for the different elements, and that's the name of the first element on the top of the KML/KMZ folder.
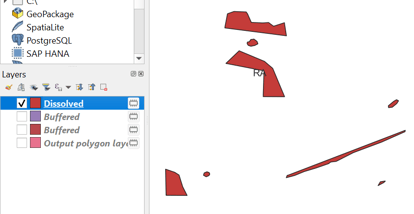
- Once we export it to RatedPower, they should all be renamed as Restricted Areas (RA)
The first option is definitely the easiest and quickest, but you can always use the second one if needed.
For any other questions or more information regarding this topic, you can contact us at: support@ratedpower.com