Learn what customized Medium Voltage (MV) routes are, what they are for, and how to create them.
Do you want to define the MV route to connect different available areas to the lowest voltage level facility? Do you want to fully customize your medium voltage trajectories between areas?
This article aims to explain how you can define MV routes and show you some examples in practice.
What are MV routes?
A customized MV route is a user-defined path that can be added to the MV cabling layout. These segments are useful to connect (via underground electrical cable) different available areas to the lowest voltage level facility (this can either be a substation ST or a switching and breaking station SBS).
So, what does this look like?
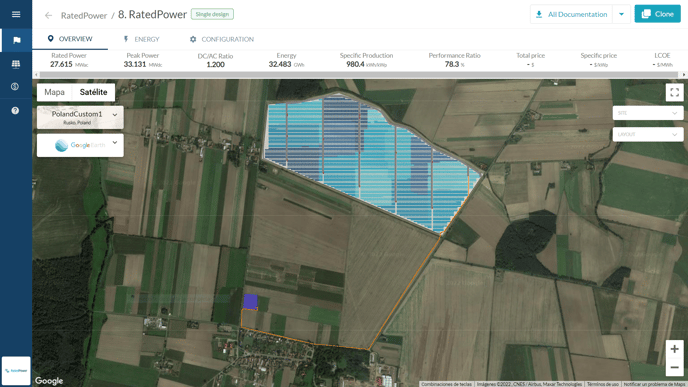
By drawing a path in the KML, we can see how RatedPower traces the MV cable as defined by the user rather than going to the substation in a straight line.
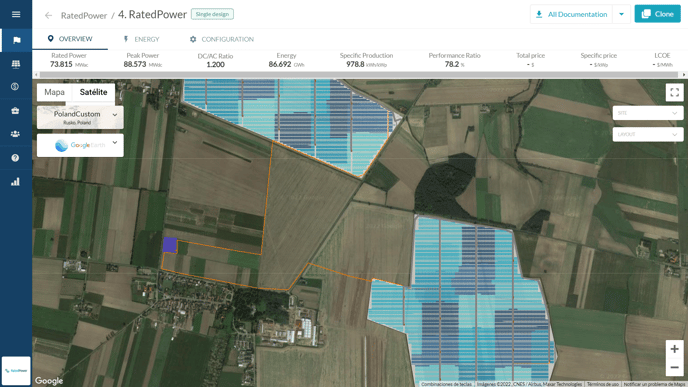
Connecting different AAs to the lowest voltage level facility (ST or SBS)
In the next example, by utilizing different customized MV cables, we can connect different available areas (AA) to the lowest voltage level facility (ST or SBS). In order to do so, we will need to define the path between the available areas to the ST/SBS polygon.
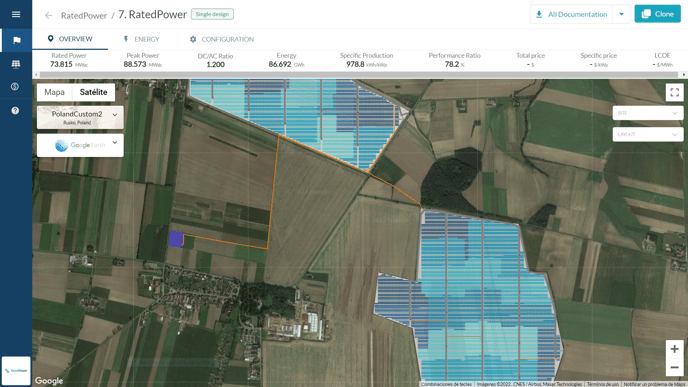
MV routes between AAs
This tool also allows you to define the connection between different AA polygons (distinct available areas). Therefore, you will need to define the path between available areas.
Helpful Hints
There are some special cases and conditions needed to use this tool:
- For the lowest voltage level facility the MV point is still mandatory. If customized MV routes are used, there is no need to define an MV point within the AA.
- An MV route can be used to:
- Connect the MV cables from an AA to the lowest voltage level facility (ST or SBS)
An end of the MV route has to be placed within the AA and, the other end has to be placed within the ST or SBS polygon.
-
- Connect the MV cables from the AA to another AA.
-
- Connect a switching and breaking station (SBS) to a substation (ST) in case you are using a multilevel interconnection schema.
In this case the connection is mandatory. Give a look to this article for more info.
How to create custom MV routes
There's two ways that you can create MV routes. One would be to do it on google earth and upload the file to RatedPower. And the other would be to create it using the site creator inside the software.
Site creator:
After getting into the site creator interface (as per the article on how to create a site directly inside RatedPower), you will be able to select the "Path" box, and choose MV Cable.

Google Earth:
After defining your site's KML/KMZ file (as per the article on how to create a site), you can opt to customize your MV route following these steps:
1. Open the site's KML/KMZ file in Google Earth (desktop edition).
2. Inside the initial site folder, create a new folder called "mv cable".
Right-click on the folder and go to Add → Folder
3. Inside the "mv cable" folder, you can define different MV routes from available areas to the substation or between available areas. To do so, you must use the path tool. You can name these routes whatever you want.
Right-click on the "mv cable" folder and go to Add → Path
4. The final step is to save the whole folder (in other words the main folder) as a KML or a KMZ.
5. You can now upload the KML or KMZ file to RatedPower. Done!
For any other questions or more information regarding this topic, you can contact us at: support@ratedpower.com