An accurate design in just a few minutes? Get started with RatedPower to optimize your PV plants!
Introduction
RatedPower streamlines the design and engineering of utility-scale solar projects, helping your development efforts from feasibility studies, through conceptual and basic design, to having a solid documentation package that gets you to NTP (Notice to Proceed). The main advantages of RatedPower are its speed, its comparison and optimization capabilities, the ease of use and user experience, and the quality and quantity of outputs it provides: over 400 pages of reports, spreadsheets, and drawings to go through the permitting process, RfPs, a subsequent detailed engineering, etc.
To understand how RatedPower works, there are three main concepts we must first define:
- Site: a KML or KMZ file that defines the boundaries of available and restricted areas along with other parcel information. The starting point of any design.
- Project: folder in RatedPower where infinite sites can be uploaded within a radius of 5 km centered in the first KML/KMZ ever uploaded. The location where an unlimited number of designs can be simulated.
- Design: a project proposal. A design can be created from scratch (a user has an initial proposal that RatedPower provides by using recommended default inputs and the user can adapt it to their requirements), or by cloning an existing design, taking inputs from a previous simulation and using that as a base for a new iteration.
Watch the following video to visualize what was just covered:
Defining a Site
Each project is defined by the first site that you upload. For more information on how to define a site, you can check the following article How to create a site. Remember that you can define as many sites and designs inside a project as you like.
Defining a project
In RatedPower, we understand a project as a place where we can upload infinite sites as long as their center is within a radius of 5 km. This radius of 5 km is defined by the first site uploaded to the project.
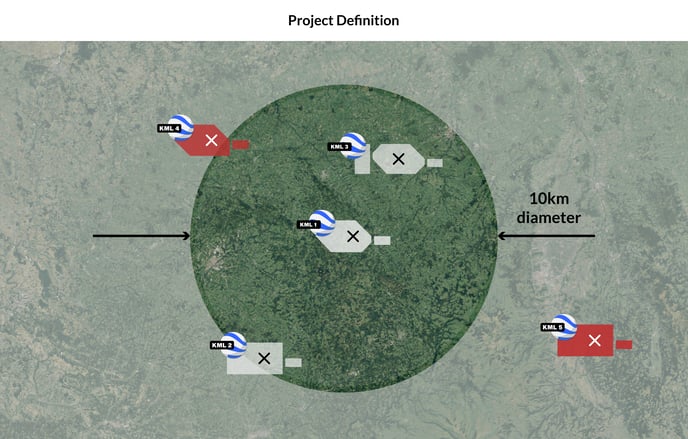
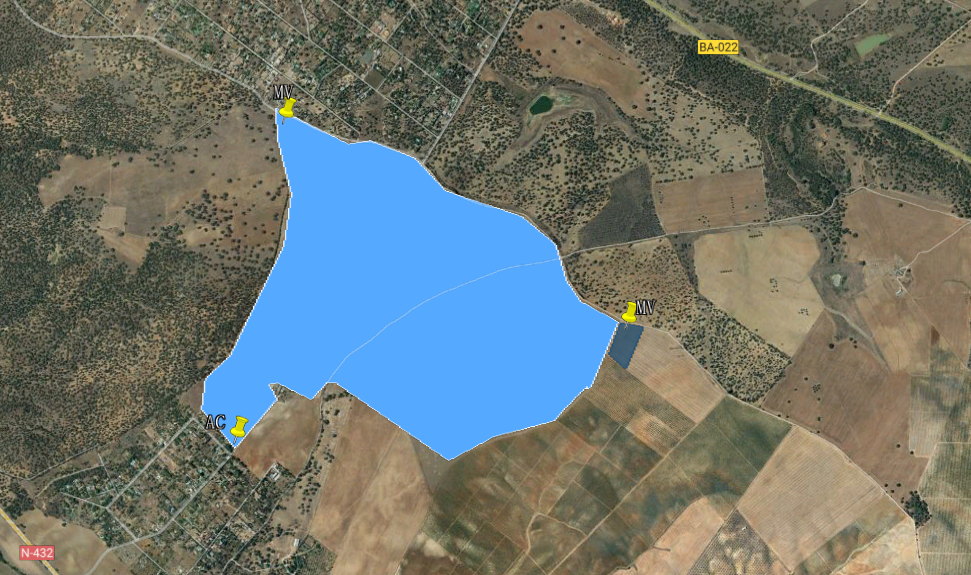
Let's see an example where different parcels will be evaluated for the same project. We first upload a site that will define the project center.
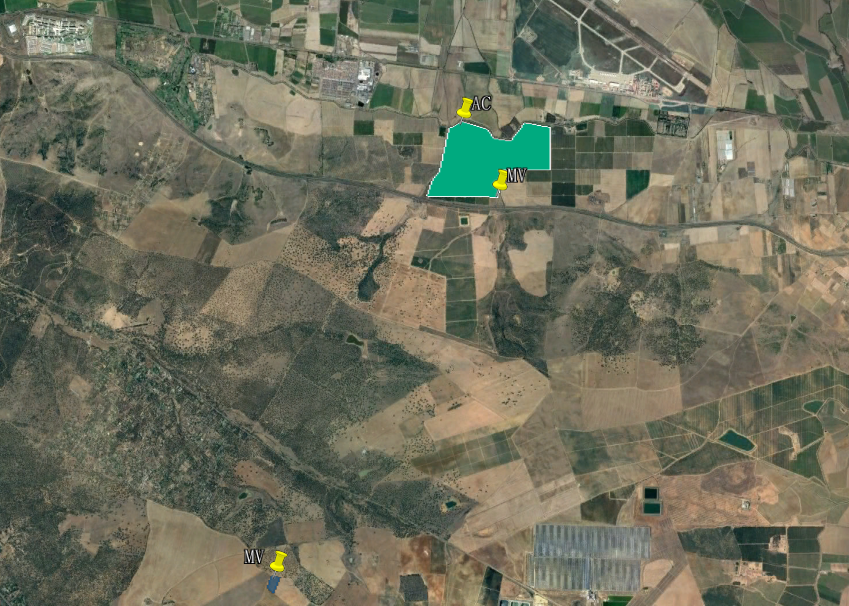
The below image shows another parcel we have created within the 5 km radius limit.
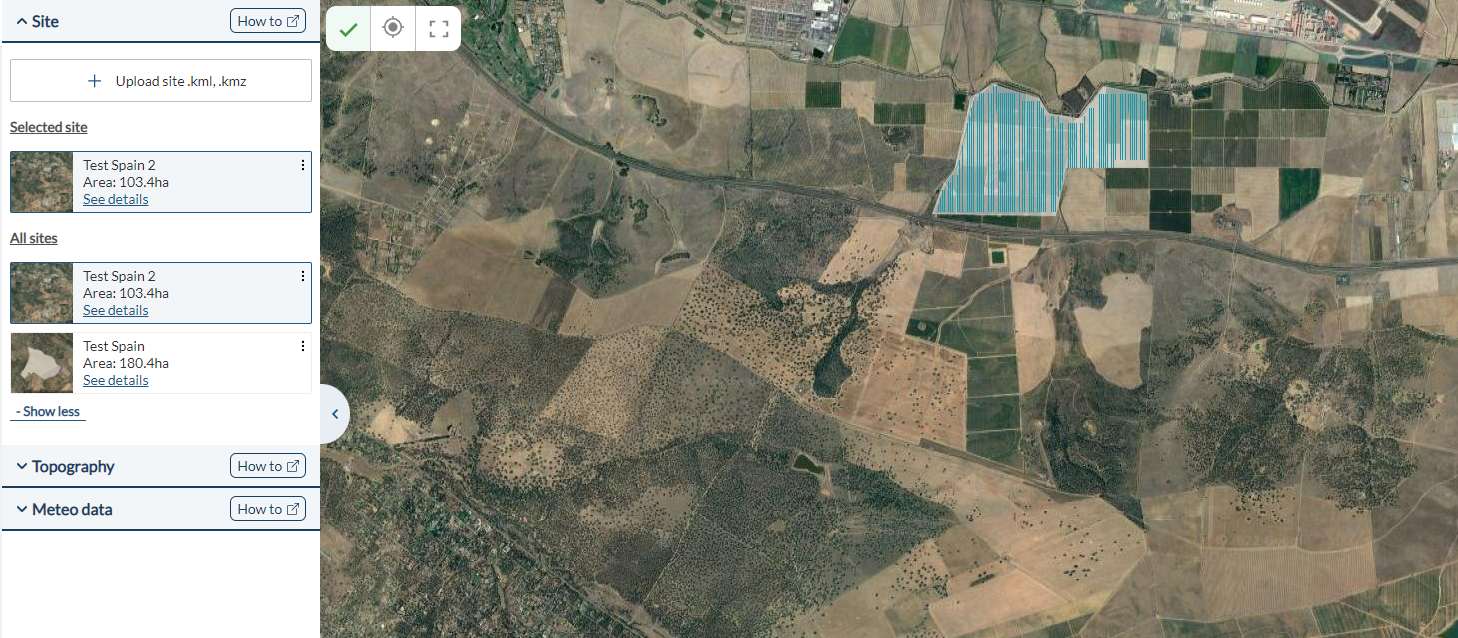
See that both sites were uploaded to the project (left-hand side panel). Infinite parcels can be uploaded to be evaluated under the same project.
If you try to upload a site that is located at a distance greater than 5 km from your first uploaded site, you will receive an error message. This limit is flexible within reason. If the site you would like to upload exceeds the 5km radius limit, but you consider it to be part of the same opportunity, please feel free to contact us at support@ratedpower.com and we will evaluate the case.
Creating a new design
When you click on Start Design, or you clone an existing design, you open the Design Process interface, a screen that consists of tabs that mimic the natural process of designing a PV plant.
At each step of the process, RatedPower recommends input values. This is done by taking into account the site details, the chosen inverter, the type of structure, and so on. Every time you change one input that affects directly the layout and/or main results, you'll get the chance to run a design.
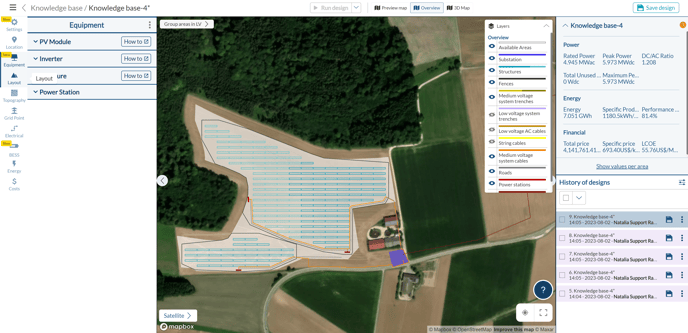
The tabs, as seen on the left side of the screenshot above, are the following:
- Settings: name of the design, unit system to be used in the documents (International or Imperial; Celsius or Fahrenheit), languages in which the documentation should be generated, logo, and notes.
- Location: defining the site where the PV plant will be built. Once a site is uploaded or created in RatedPower (the two options are available), the topographical and meteorological data, the horizon profile, and the surface albedo are calculated by RatedPower (the latter two can be seen in the Energy tab). Custom topography and meteorological data files can also be uploaded, by following the instructions found in the How to upload your topography and How to upload your meteorological data to RatedPower.
- Equipment: select your PV module, inverter (central or string), and racking system (trackers, fixed structures, or east-west structures) from RatedPower's extensive public database. It is also possible to upload PV modules and inverters to a private database that can only be accessed by users from the same company as the uploader. In this tab, you can also define the number of inverters per power station. In case you need additional structures to the ones available, or a custom rack, use our structure importer. Here you have two articles on How to upload your own equipment: modules & inverters, and structures.
- Layout: decide how much capacity to install in your PV plant, what distances and setbacks to apply, and some other civil preferences: roads, power station dimensions, structures' orientation, etc. We recommend you visit our How to define the civil parameters of your site article.
- Topography: select your topography criteria to exclude certain structures or apply earthworks to get estimated cut and fill volumes. Learn more by reading the How does the RatedPower topography tool work article.
- Grid Point: define the type of interconnection facility (Switching and Breaking Station or Substation), overhead line, and grid connection requirements (power factor). For more information, you can check How to design your substation and How does the Power Factor Tool in RatedPower work?
- Electrical: define your electrical configuration. Cables can be sized following the IEC, NEC, Australian, or Chinese standards. You can also change some cable characteristics and select which cable cross-sections you tend to use. For more information on the electrical aspect of RatedPower, you can check our How to define your electrical configuration article.
- Energy: check the horizon and albedo data, add a monthly albedo profile if you wish to, PV module losses, inverter auxiliary losses, and much more. You can also edit some advanced parameters (U-factor and IAM loss model).
- BESS: this tab will only be enabled if you have previously allocated an area for a storage system (named BA) within your site. Add an AC-coupled BESS to the PV plant using RatedPower to obtain the basic engineering of the system, a design report, BOQ, and the SLD.
- Costs: the last step before creating a design. Here, you can create price templates that will be automatically used to calculate the CAPEX and LCOE using any of the quantities that RatedPower quantifies (such as the entries of the BOQ). The tool includes default price estimates taken from IRENA's reports (International Renewable Energy Agency).
Clone a design & compare
Want to create an iteration of a certain design? Would you like to change just a few parameters to compare the effect in the results? Our clone design feature allows you to start a new design based on the inputs of an already-created design. This can help you create as many iterations of the project as you wish and thus be able to compare different scenarios in a very quick and efficient way. To compare your design, select up to 25 from your project page, and click on Compare.
Conclusion
This article scratched the surface on the following points:
- RatedPower accepts infinite sites and designs in the same project as long as their center is within a radius of 5 km.
- A project in RatedPower is defined by the first site that is uploaded to that project.
- The "Clone Design" functionality is an iterative tool that facilitates the modification of specific parameters to optimize a project.
For any other questions or more information regarding this topic, you can contact us at: support@ratedpower.com